 "Andrew Pascarella" (racedinanger)
02/04/2016 at 10:00 • Filed to: Project truck, overlanding, mitsubishi, montero, garbage montero, racedinanger
 6
6
 12
12|
"Andrew Pascarella" (racedinanger)
02/04/2016 at 10:00 • Filed to: Project truck, overlanding, mitsubishi, montero, garbage montero, racedinanger | 6
| 12 |
After buying a run down truck,
!!! UNKNOWN CONTENT TYPE !!!
and brining it home,
!!! UNKNOWN CONTENT TYPE !!!
then spending the better part of 4 weekends cleaning it,
!!! UNKNOWN CONTENT TYPE !!!
It was time to start fixing the mechanical issues and get the truck road worthy so I could actually take it on a camping trip or two for the summer.
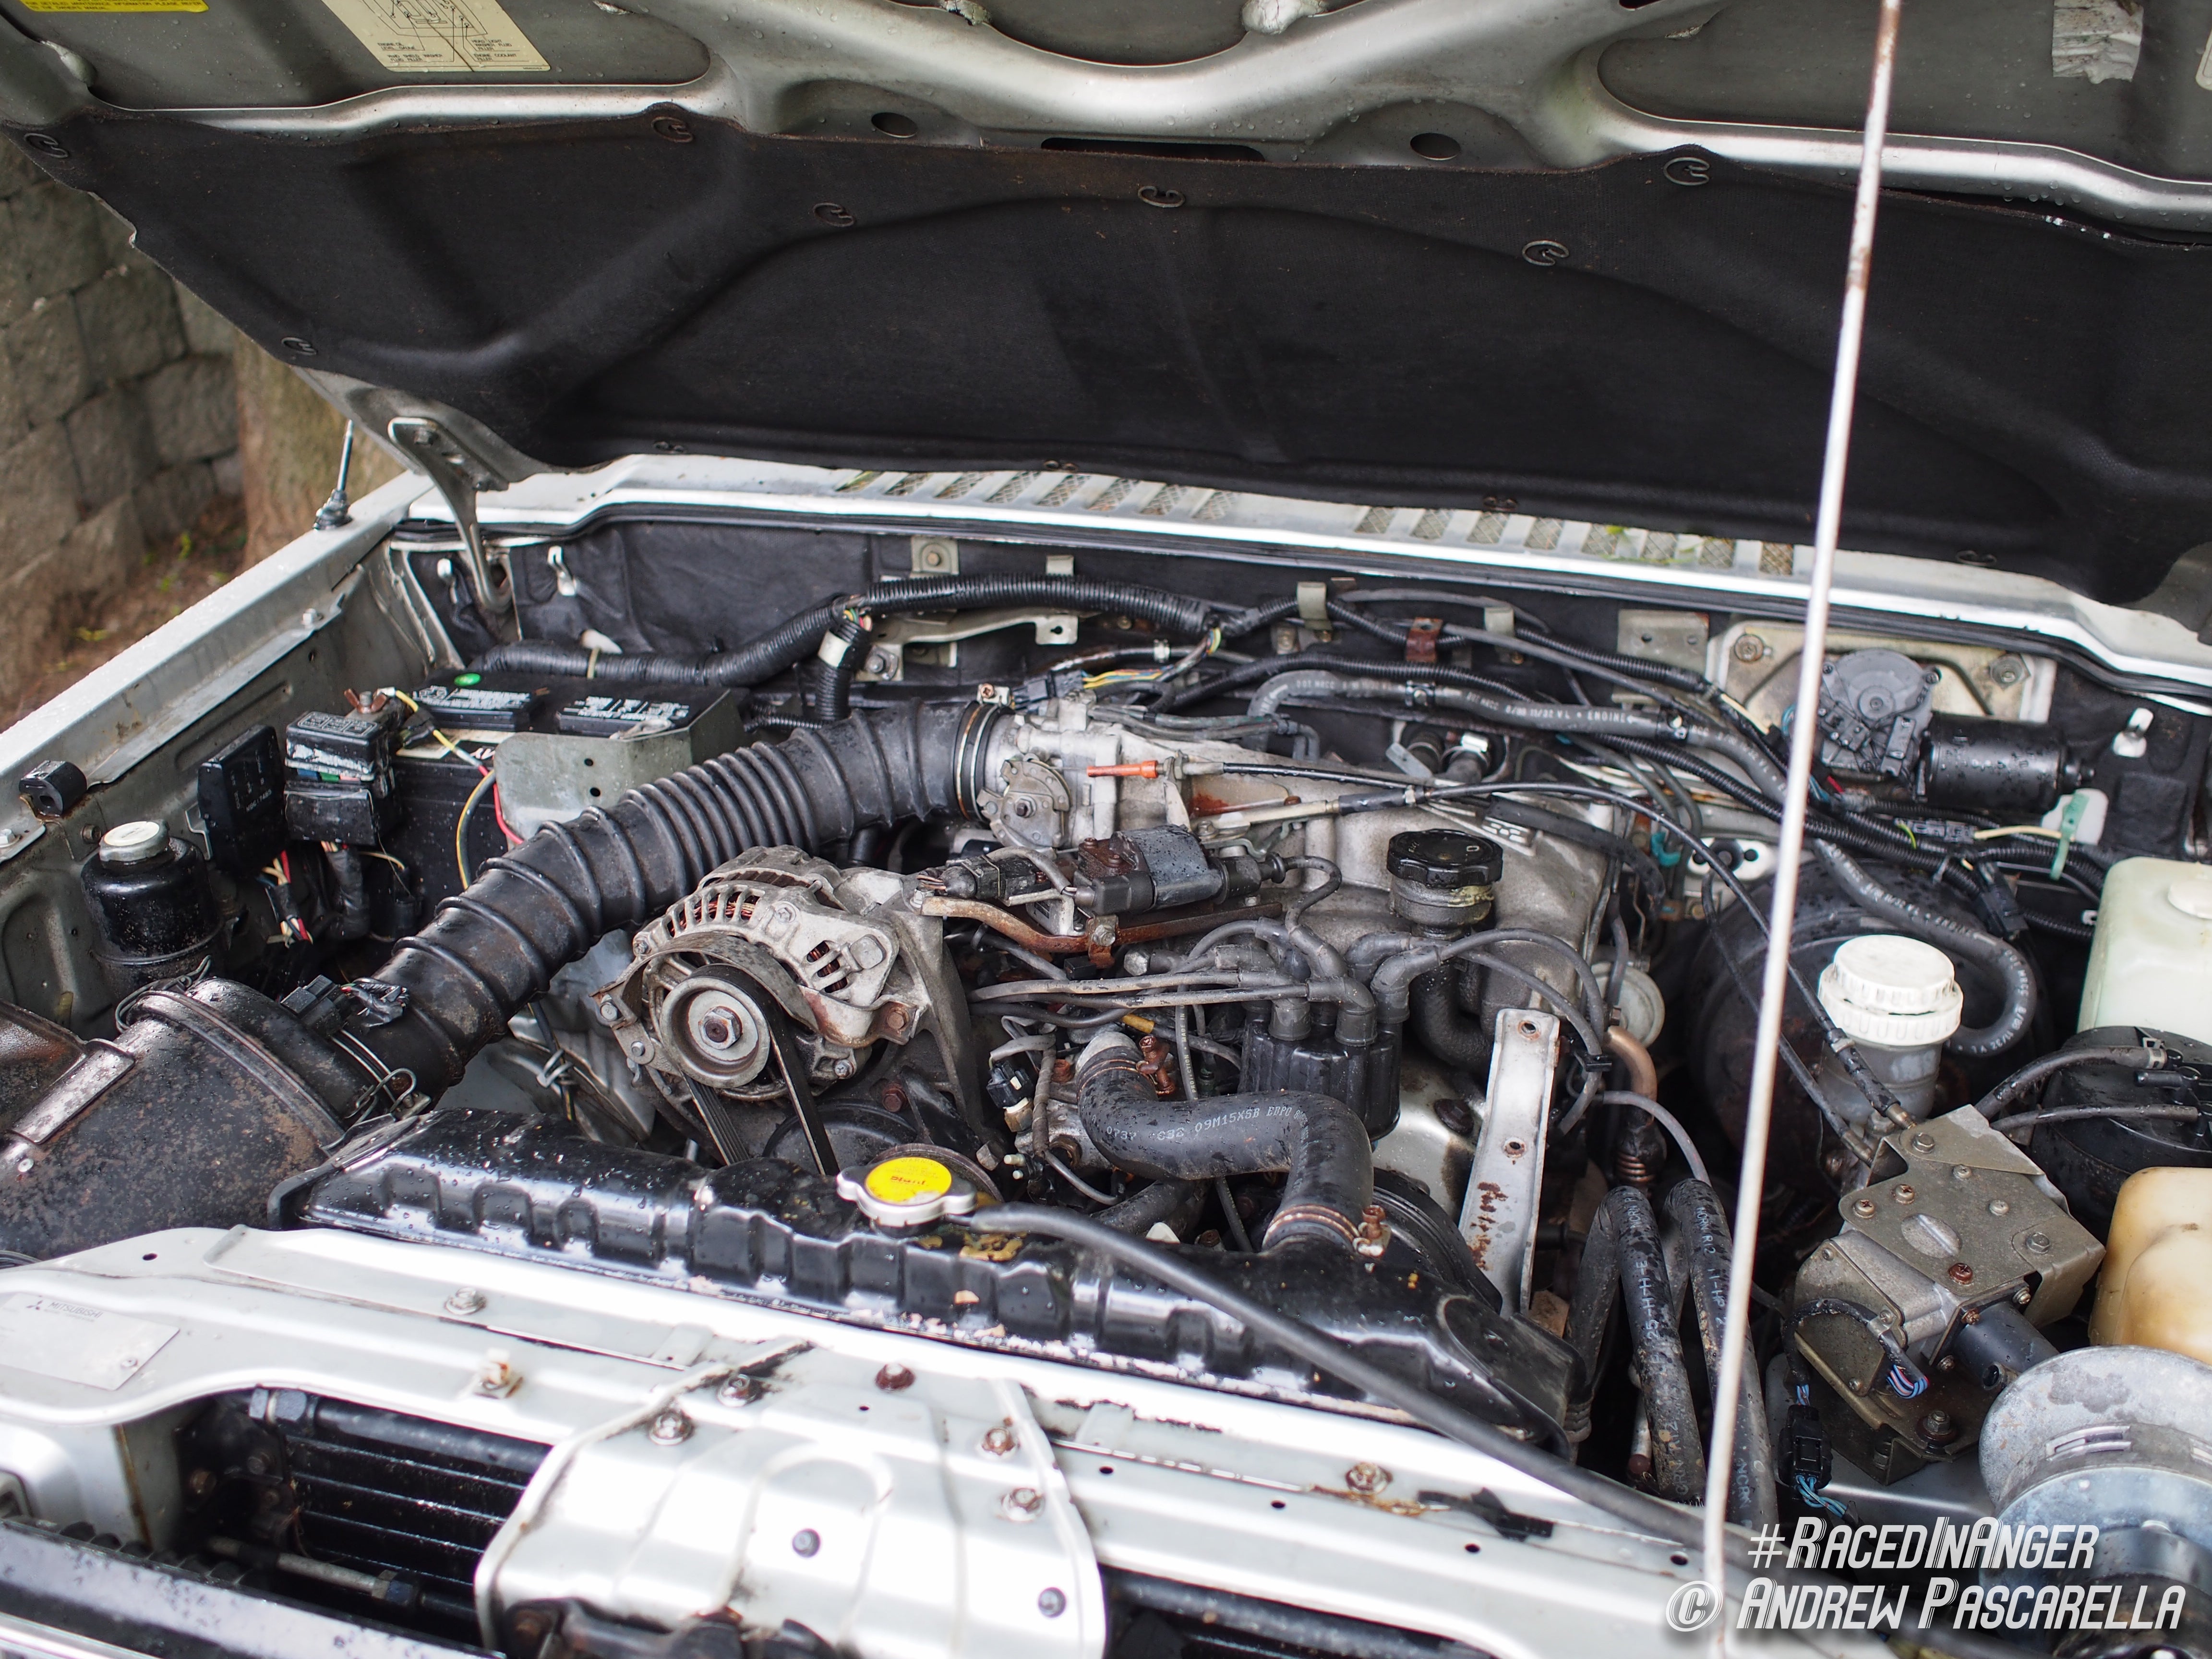
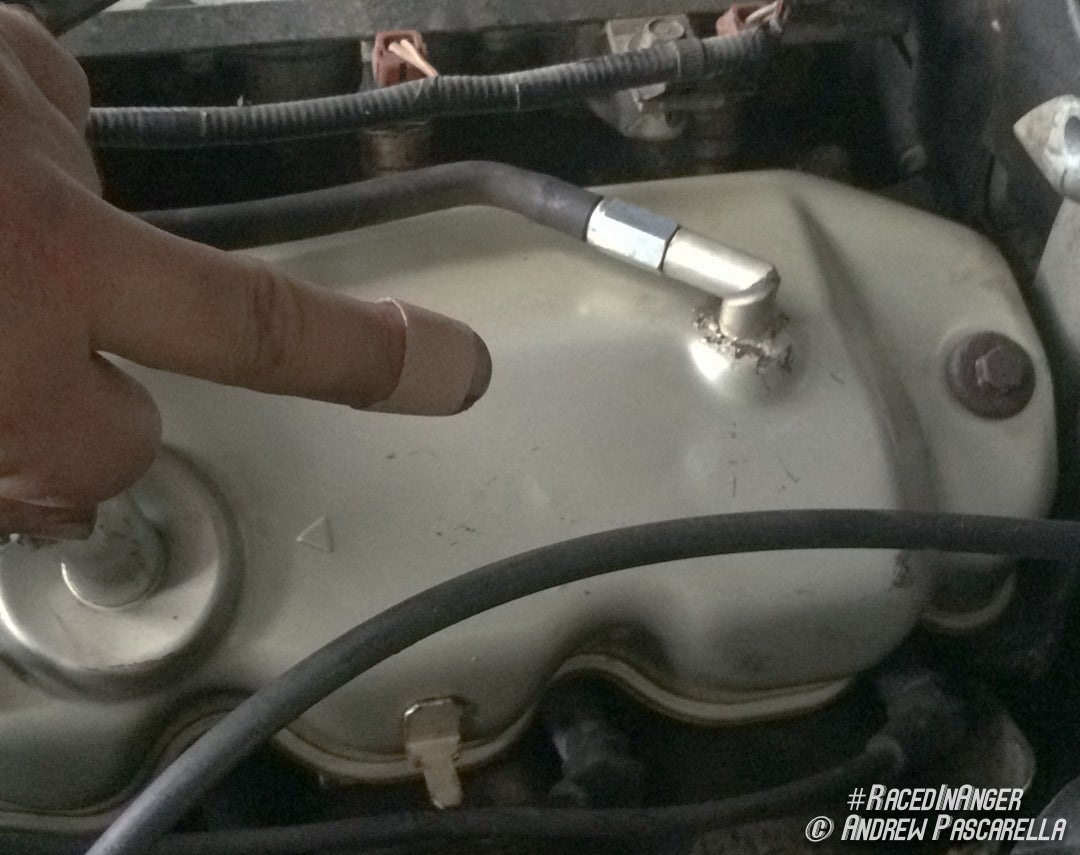
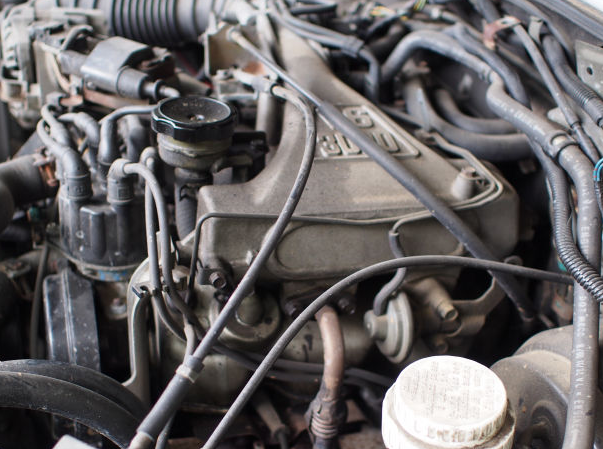
Once the engine was warmed, a strong ode to 10w30 would waft through the air. The oil smoke coupled with an oily build up on the valve covers meant the gaskets had long ago dried out and stopped sealing. Additionally the EGR pipe between the intake and left exhaust manifold had split open, giving the Montero a horrendous exhaust leak. Someone tried to seal it with muffler putty and maybe that worked for the ten minutes needed to get an inspection sticker. I needed to fix it the right way and to do the valve cover gaskets the intake had to come off. So at the same time, this $100 dealer only pipe had to come off and the repair job became a two for one deal.
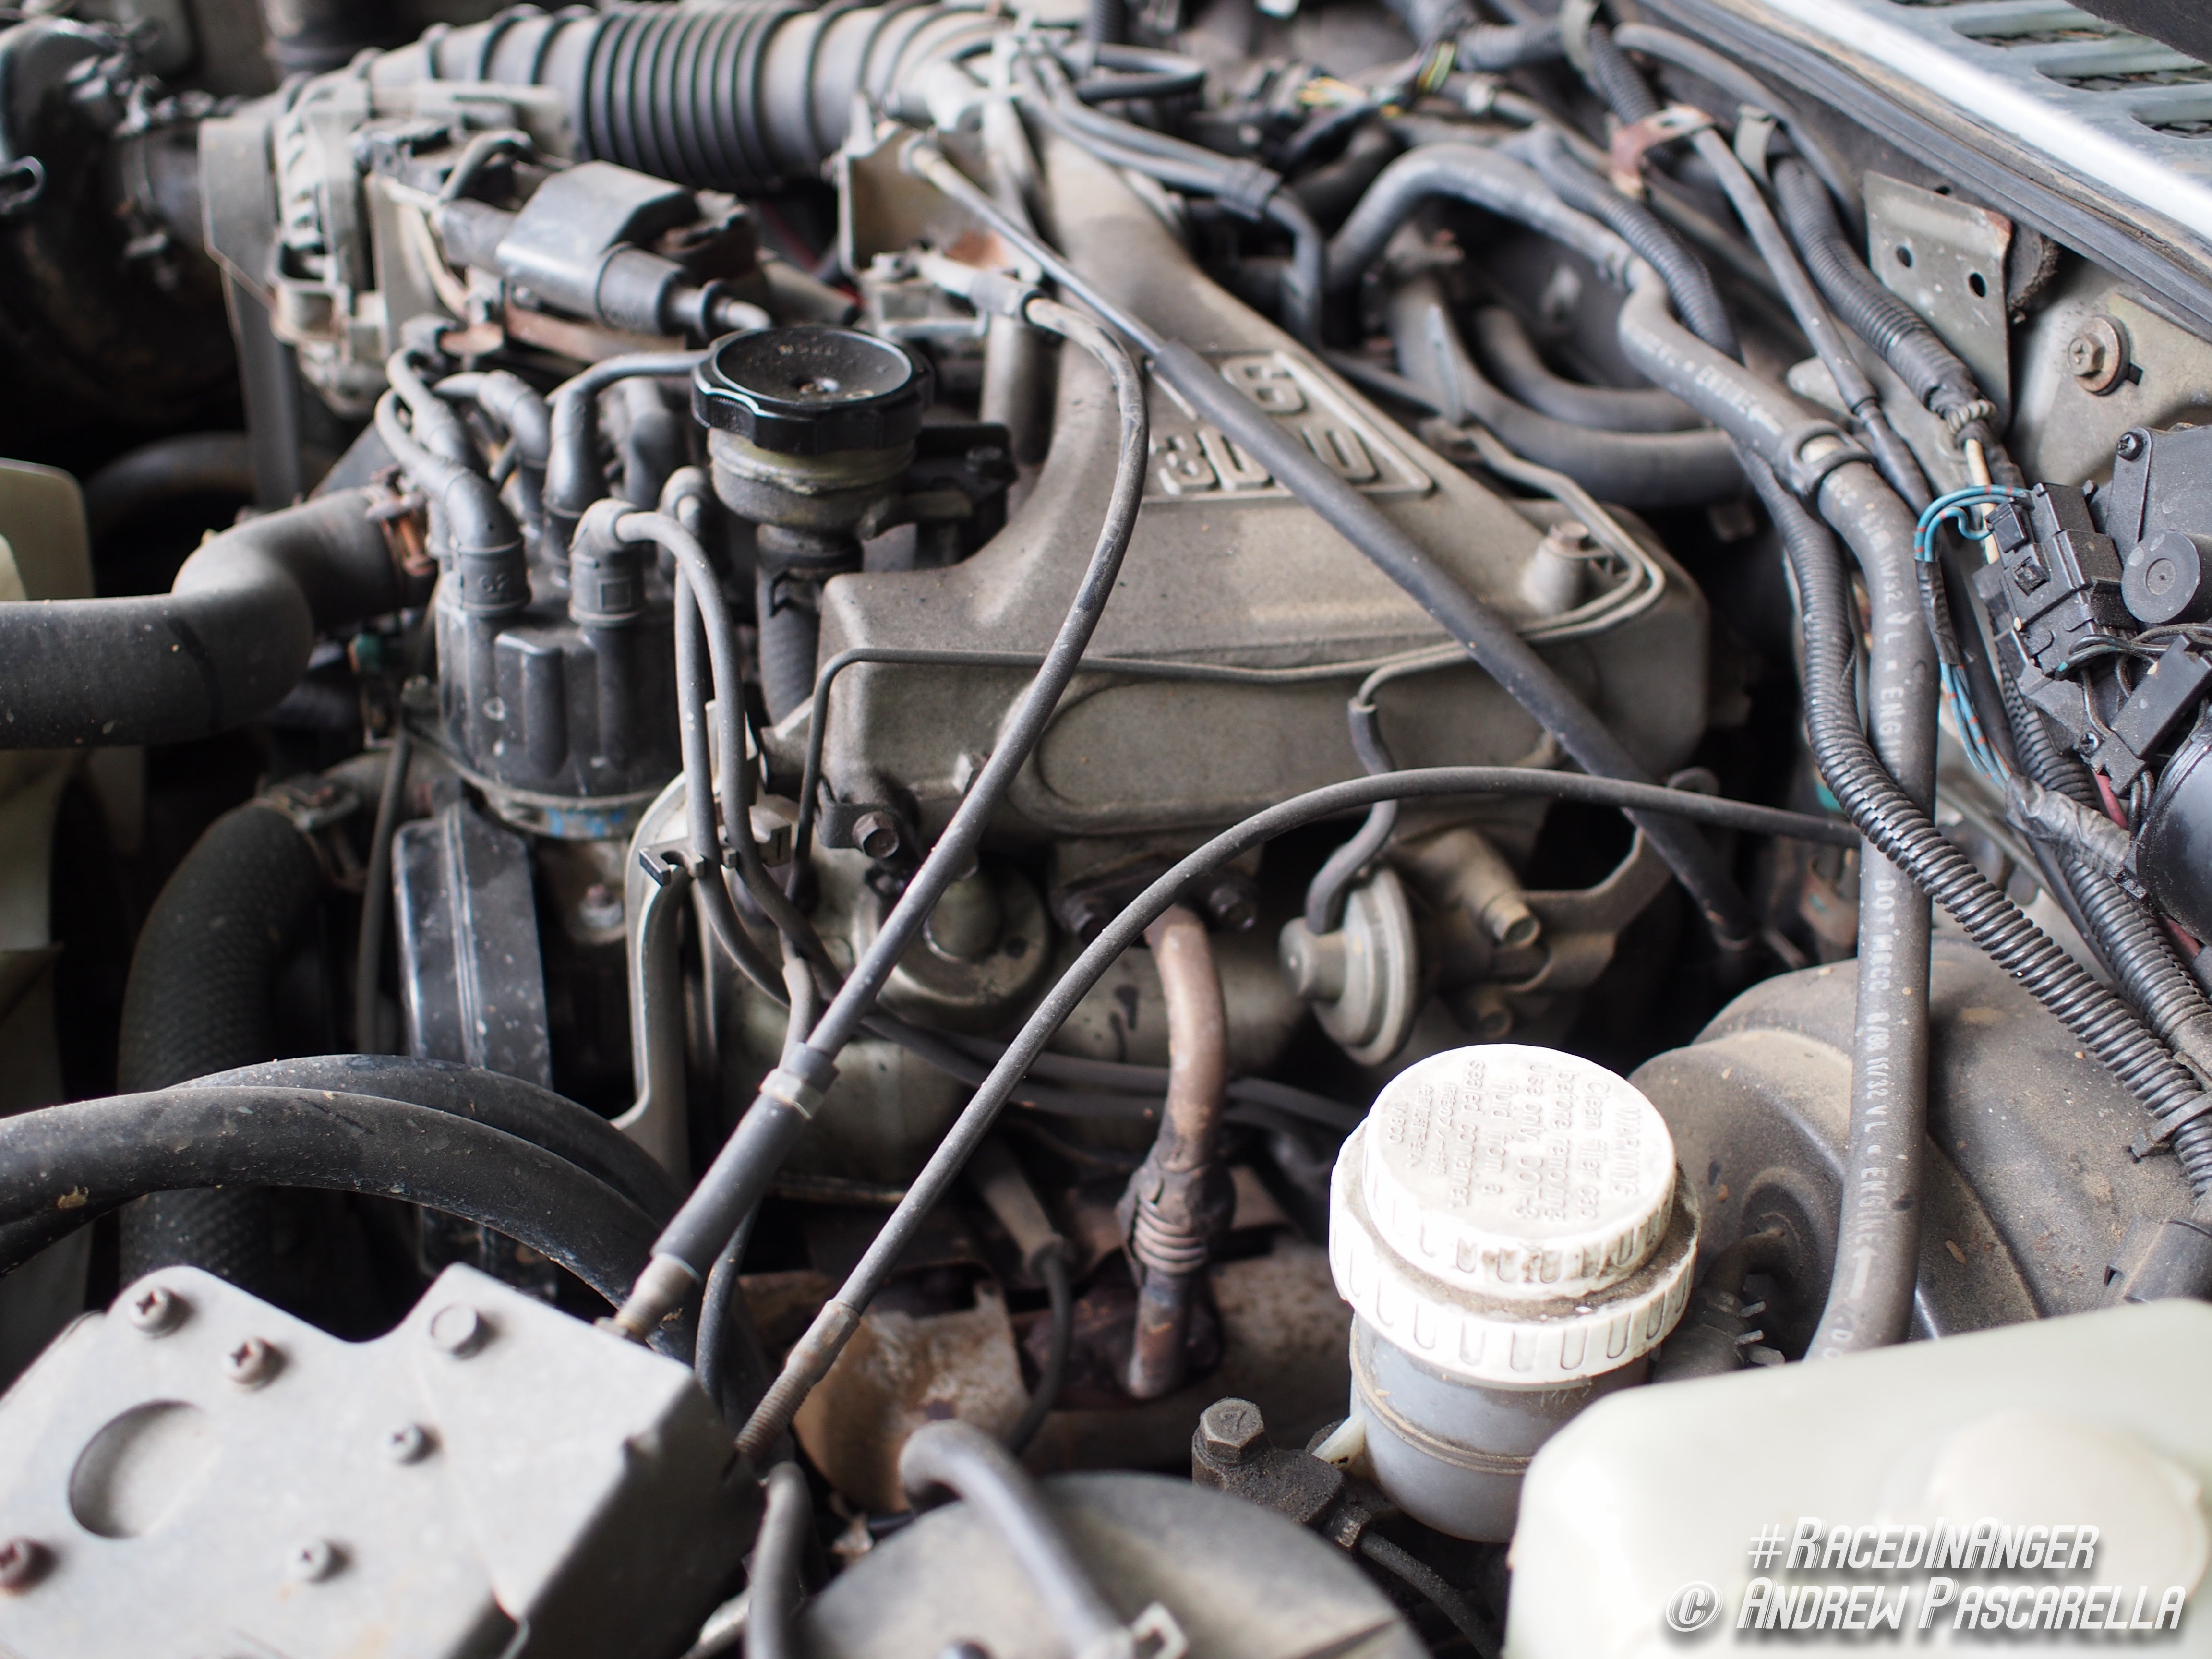
The Montero uses a version of the 6G72 V6, a common engine among 80s and 90s Mitsubishi and Chrysler products. 6G72s are nothing special performance wise, with SOHC heads and a timing belt it was an “advanced” and “modern” engine for it’s time compared with most American V6s derived from chopped down V8s. (Actually the guy that sold me the truck wanted to swap in a 4.3l GM V6 from an S10 Blazer) Comparable with ‘80s lumps, it only makes an optimistic 140 hp with around 170 ft-lbs and is literally just enough power to move a vehicle the size of the Montero. It’s amazing how far engine tech has come, these type of numbers are totally anemic for a 3.0l v6 in today’s world where 250-300hp feels like the norm.
Valve cover gaskets
On 6G72s like the one in the Montero, the upper half of the intake manifold projects over the left cylinder head. Thus preventing removal of the valve covers without separating the intake manifold. While aftermarket valve cover gaskets are easy to come by, single intake gaskets are not. The gasket to go between the upper half and lower half of the intake manifold had to come from my local dealer for about $10.
I vacuumed the intake valley out as well as I could before removing the intake. I didn’t want debris falling into the lower intake. Removing the upper intake was a little tricky. I didn’t want to remove the throttle body and disturb those gaskets, so I had to unclip the throttle cable and a couple of coolant lines. One was a real pain, it faced down and toward the firewall, but once off, the hose could be pointed upward to minimize the coolant leakage. Then I moved the coil bracket out of the way and pulled the spark plug wires aside. The intake bolts were a straight forward removal, with the rear one being a nut and stud to help locate the intake when installing. Once those were removed, a gentle knock to the intake manifold freed it from the engine.
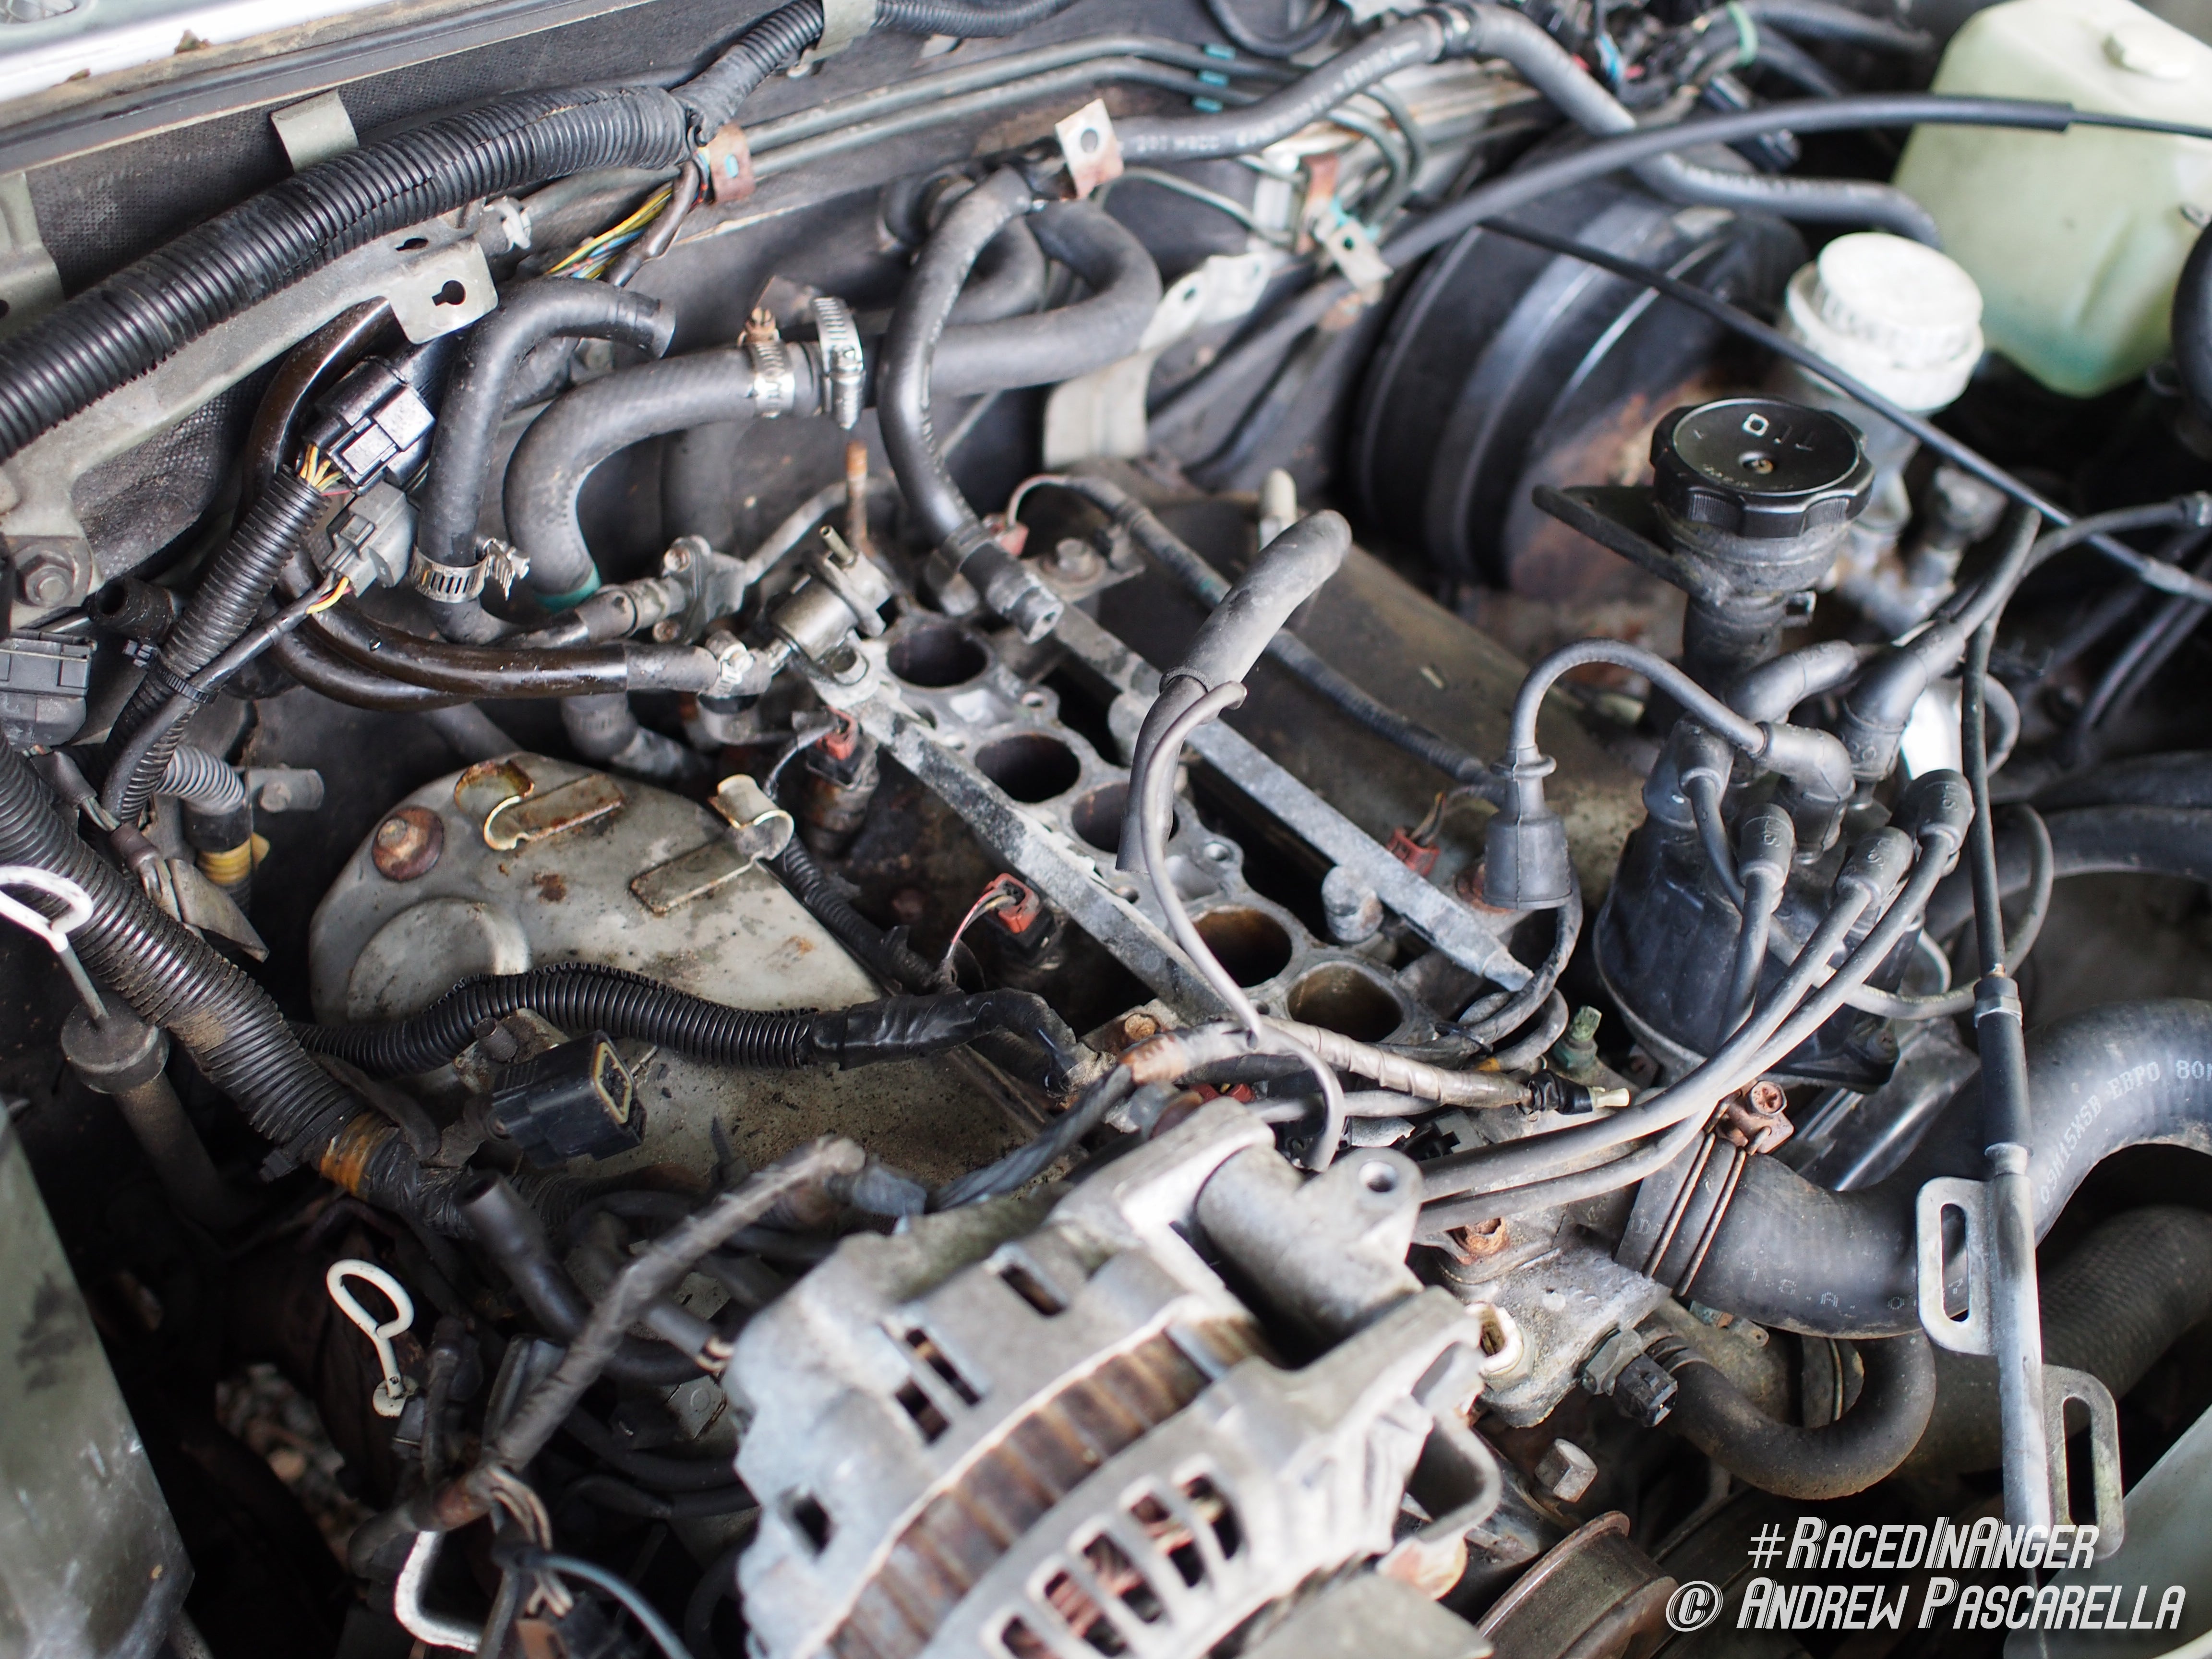
Once the upper intake is lifted off. Only two bolts hold each valve cover on, after removing both bolts, the valve covers lift right off the engine.
Then the pain the ass task of digging out completely dried and hardened valve cover gaskets from the covers began.
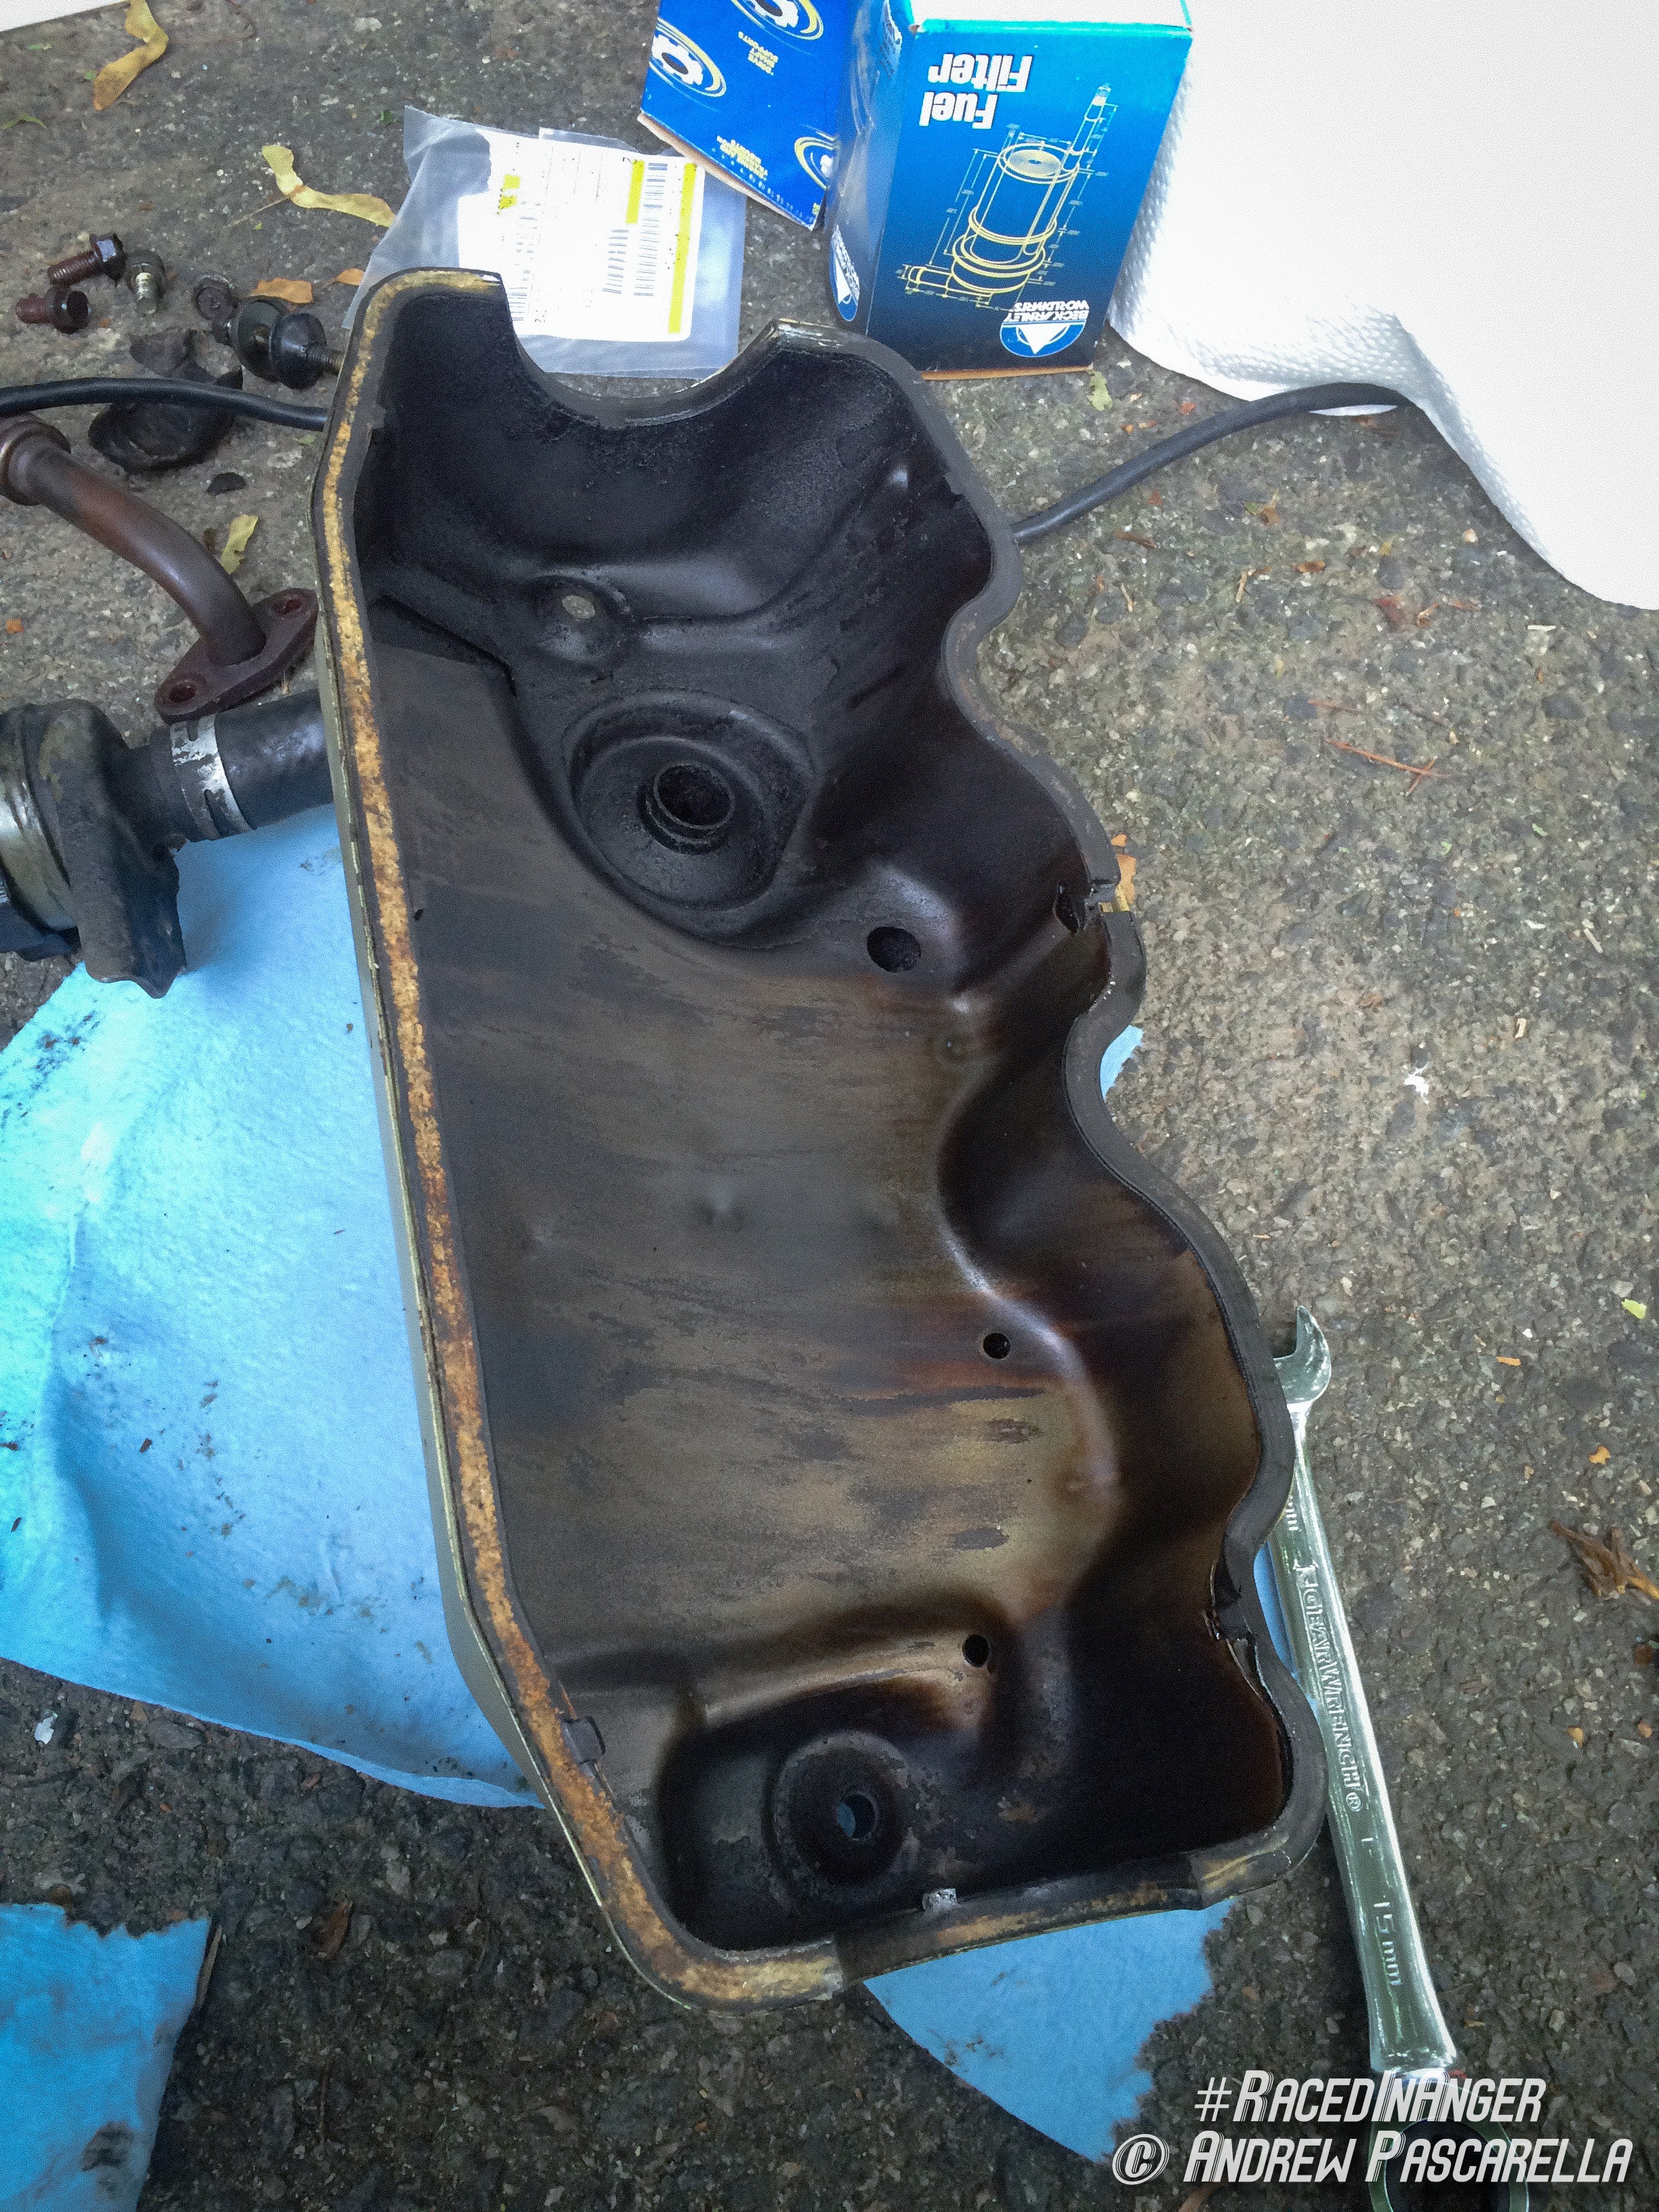
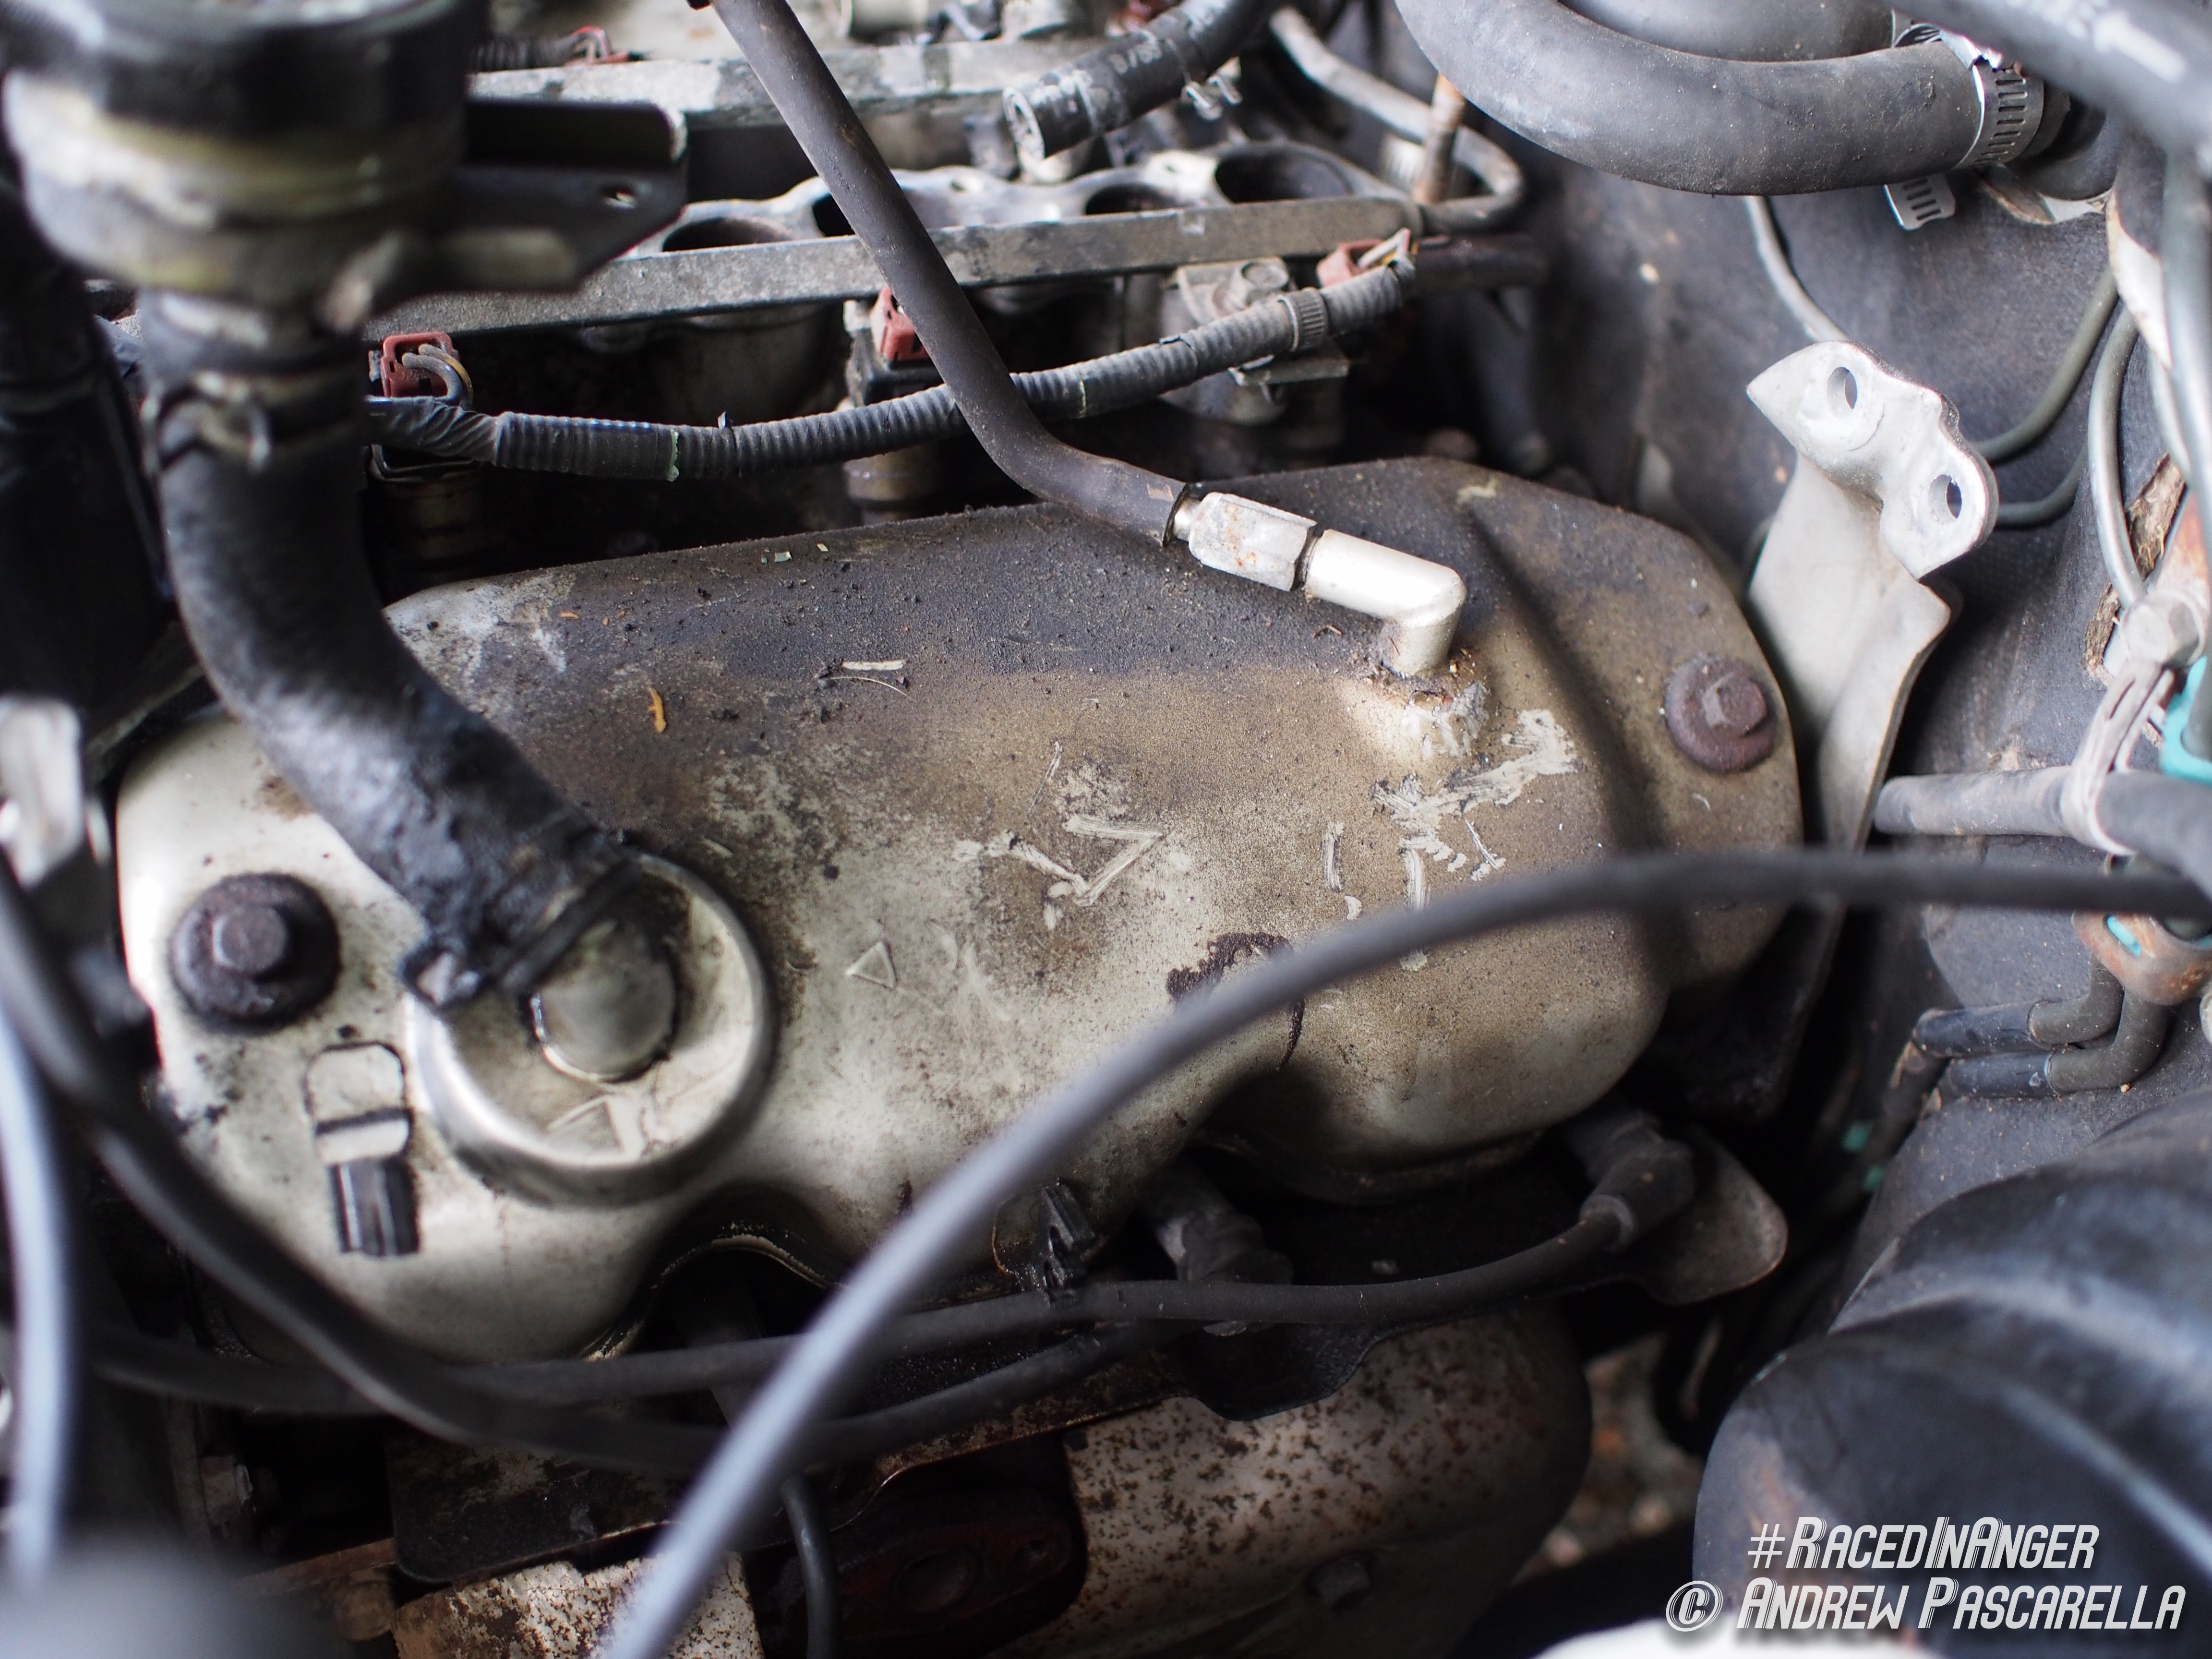
It was miserable and probably added 2 hours to a job that should have only taken an hour. After much cursing and some puncture wounds later I had the new ones installed. I also took the time with the upper intake manifold off to replace the PCV, ideally insuring my new valve cover gaskets do their job and keep the crankcase pressure sealed up. PCVs can clog and crankcase pressure will often find the weakest place to leak, like valve cover gaskets or in extreme cases blow oil out of the dipstick tube.
Other than the extremely baked on valve cover gaskets, this wasn’t a difficult job. However this was only the beginning for the Garbage Montero’s road to recovery.
Stay tuned for part 5 of the Garbage Montero
 Luc - The Acadian Oppo
> Andrew Pascarella
Luc - The Acadian Oppo
> Andrew Pascarella
02/04/2016 at 10:12 |
|
I find a wood chisel worked best for removing the stuck on cork gaskets.
A putty knife did nothing at all for me.
 Rusty Vandura - www.tinyurl.com/keepoppo
> Andrew Pascarella
Rusty Vandura - www.tinyurl.com/keepoppo
> Andrew Pascarella
02/04/2016 at 11:08 |
|
I really like this picture. Cell phone? What type?
|
Andrew Pascarella
> Luc - The Acadian Oppo
02/04/2016 at 12:45 |
|
These gaskets basically vulcanized into a brittle plastic. It was miserable digging those out. I wish they where on a flat lip, but instead captured in the cover.
|
Andrew Pascarella
> Rusty Vandura - www.tinyurl.com/keepoppo
02/04/2016 at 12:47 |
|
That was with my Olympus OM-D EM-5 with a 17mm lens that I sold last September.
|
Rusty Vandura - www.tinyurl.com/keepoppo
> Andrew Pascarella
02/04/2016 at 12:49 |
|
Thanks. OM-D is a nice body. Nice shot.
|
Andrew Pascarella
> Rusty Vandura - www.tinyurl.com/keepoppo
02/04/2016 at 12:58 |
|
It's a great camera, but since I already have a serious canon setup I didn't need it.
 Rufant v1.0
> Andrew Pascarella
Rufant v1.0
> Andrew Pascarella
02/04/2016 at 14:21 |
|
This reminds me of doing the heads on my Pajero (to re-cut the valve seats). It has the same pita style of intake manifold. It was also SOHC but used rockers to operate 4 valves per cylinder. I’ve never seen a set up like it.
|
Andrew Pascarella
> Rufant v1.0
02/04/2016 at 17:33 |
|
That’s the way this is. I’ve got a second truck that I need to do head gaskets on this spring.
|
Rufant v1.0
> Andrew Pascarella
02/05/2016 at 00:12 |
|
Right. My engine must have been a updated version of yours. Doing the heads wasn’t too bad from memory, especially once you got that manifold off.
Stretch bolts I think. The head bolt holes got a bit of fluid in them on dis-assembly so blow that out so you don’t get a false torque reading. I did injector seals while it was apart as well.
Then you can imagine you are driving this:
Also some cool Paj racers in the first video here
http://overland.kinja.com/stuff-17565598…
 BJ
> Andrew Pascarella
BJ
> Andrew Pascarella
02/05/2016 at 10:16 |
|
This is good stuff. I can’t wait for the next installment of the series!
|
Andrew Pascarella
> BJ
02/05/2016 at 12:23 |
|
Thanks, I'll keep at it.
 Brad D
> Andrew Pascarella
Brad D
> Andrew Pascarella
02/08/2016 at 21:30 |
|
I really should do a companion series for the Junkyard Raider .